|
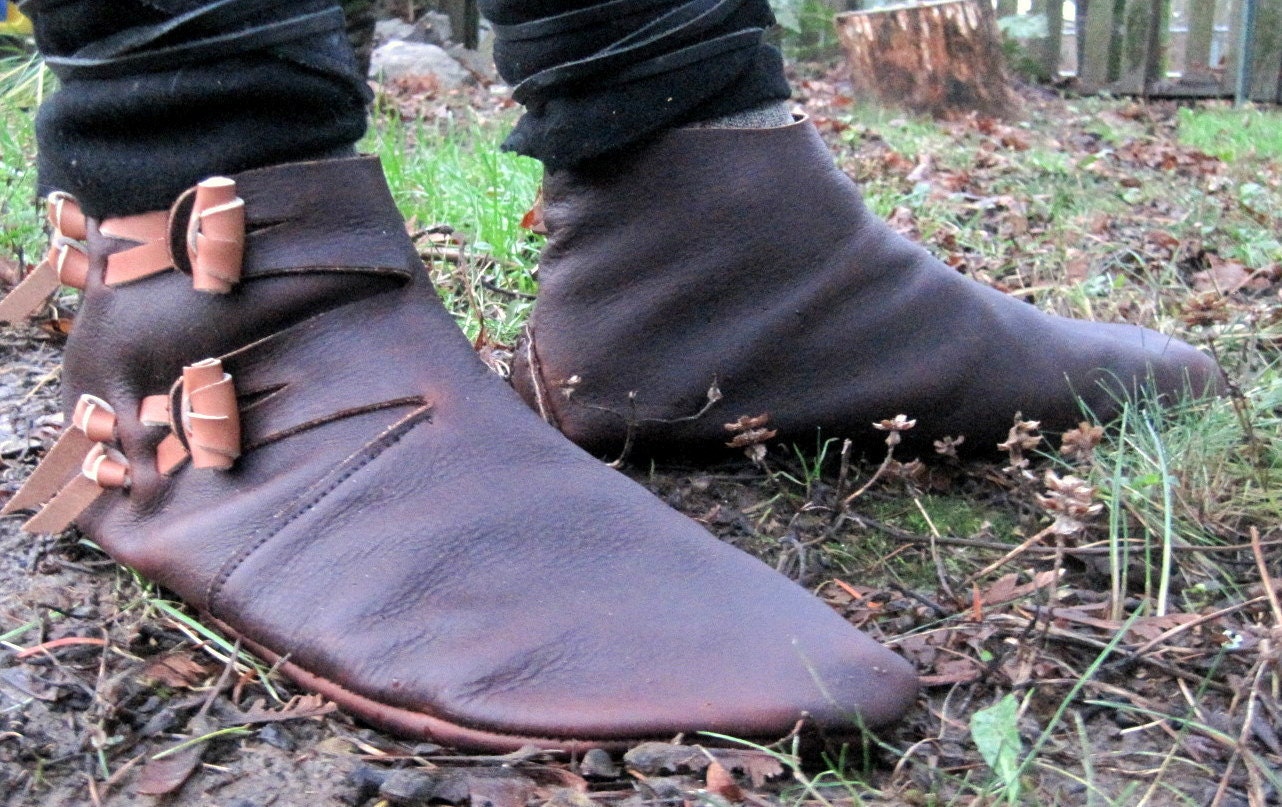
| Dorestad: Old Norse Reproduction Handmade Leather Shoe by Barefoot Cordwainer on Etsy |
A while ago, while browsing
Etsy.com, I discovered this beautiful pair of handmade shoes, reproductions of a 9th - 10th century
Norse style shoe by Ian at Barefoot Cordwainer. I really loved them, but couldn't quite afford to buy them, so I thought I'd give shoe-making a shot and see if I could figure out how to make a pair for myself. I searched the internet for how-to's and tutorials on the subject, but most of what I found related to Native American style moccasins, not medieval European style shoes, so they were of little help. I ended up piecing together my process from several different sources, each of which contributed their experience to my plans.
Disclaimer: it has been over a year since I actually made my Viking shoes, and I've intended to write a post about the process since then, but seeing an actual extant example of a Viking shoe like mine in the Jorvik Museum in York, England a few weeks ago has rekindled my motivation to publish this post. So my memory of the shoe-making process might be a little spotty and I might miss some things in my explanation below. Hopefully this will still be interesting and informative for you, whether you're just curious, looking to make your own medieval shoes, or want to better appreciate the handmade shoes you're about to buy from Ian (the Barefoot Cordwainer).
Note: This is NOT a process for kids. The shoe-making process (at least how I did it) involves using sharp things in very close proximity to human flesh. And it is complicated. Please be careful.
***Possibly the Most Important Note: These shoes are supposed to fit snugly; they will conform to your feet and therefore move better
with you. Make sure they're snug, but not too tight.
Supplies:

- mock-up:
- sock
- sewing needle and thread
- duct tape
- sewing pins
- fine-tipped pen
- scissors
- fabric (good if it's slightly stretchy)
- final shoes:
- leather (I used elk hide)
- sewing needle and thread (specifically for leather)
- fine-point felt-tip pen
- an awl
Making the Mock-Up:
The mock-up will serve as the pattern for your actual shoe, and since you want your shoes to fit snugly and conform to your feet, using a well-fitting sock is important. You just need one mock-up, because you can use it as the pattern for both your right and left shoes.
 |
| Fig. 1: blue= where to draw and cut seams in duct tape sock |
- Put the sock on your right foot and then cover the sock in duct tape. Make sure to leave the rim of the duct tape-sock where you want the tops of your shoes to sit on your ankles (or legs, if you're making boots). Don't wrap the tape too terribly tight, as you don't want to make the shoes too small, and also be sure to leave room between the sock and your foot so you can cut it off of your foot.
- Draw your seams onto the duct-tape sock [figure 1]. This can be a bit tricky. At this point, do not worry about the little straps that will form the closures for the shoes; you're just working to get the shape for the two main pieces of leather so that they will fit your foot properly. Draw a line around the base of your foot for the seam between the sole and body of the shoe, then another from the top of the shoe, down the center, then turning toward the sole (toward the outside of your foot) almost halfway to the tip of your foot.
- Cut along the seams you just drew, literally cutting the duct tape sock off of your foot. Be very careful that you don't cut your foot! You should end up with two pieces of duct taped sock: the sole, and the funky-shaped body. Flatten these out as much as possible so that the next step will be accurate.
- Trace the cut out duct tape sock pieces onto your fabric, then add at least a centimeter for stitching where the seams will be [figure 2]. You also need to add the triangle-ish straps at this point, which you can do by drawing the shape on a piece of paper and then adding it to the pattern for your shoe body, twice, so that you'll end up with two straps. Don't forget the little triangle heel-reinforcement piece!
 |
| Fig. 2: tracing the duct-tape sock pieces onto the fabric |
- Cut out and stitch together your new fabric mock-up. Stitch the body together first, then add the sole and heel-triangle. This is harder than it sounds, as you need to make sure that your pieces are lined up properly. You'll probably need to make some adjustments along the way. Check often to make sure that it fits on your foot and adjust accordingly. Remember that you want the shoe to be snug, but you also need to be able to wiggle your toes and get your foot in and out without straining the fabric too much.
- It can help immensely to mark notches in the heel and toe to help in matching the pieces up properly in the leather version.
- Once your mockup fits how you'd like it to, take out all of the stitching, and it can be used as the pattern for your actual leather shoes.
Making the Leather Shoes:
 |
| using the fabric mock-up as a pattern on the leather |
1. Choose the parts of your leather that will make the shoes (thicker parts for the soles, softer - but not too soft! - for the upper parts) and trace your fabric pattern onto the suede (back) side of the leather accordingly. Make one set of pieces (sole, upper, heel-triangle) for each foot, and mark them on the back as you cut them. Use the pattern right side up for your right foot, then upside down for the left. Be sure to transfer the notches from your pattern to the back sides of the leather, too.
 |
| stitch together the shoe body first |
2. Stitch the shoe uppers (body) together first. Depending on your materials, you might need to punch holes in the leather with an awl before stitching. Remember to stitch it inside out.
3. Stitch the soles to the uppers. Take this slowly and carefully. Remember that leather is not as forgiving as fabric, and that's why making all of the adjustments in the mock-up stage is important. Make use of the notches you marked from your pattern to be sure your soles match with the uppers properly. If you're punching holes for stitching, counting to make sure the numbers match up helps immensely. And don't forget the heel-triangles [figure 3]!
 |
| Fig. 3: sew the heel-triangle in as shown so it will look right when turned right-side-out. |
4. Construct the toggle-ties [figure 4]. You will need 4 of these, 2 for each shoe. I made these out of a slightly thicker and stiffer leather, in a lighter color (white) to accent the shoes. Cut 4 strips, each about an inch wide, and then cut them in half down most of the strip's length, leaving enough space to cut a slot to feed those two ends through in order to make the toggle's toggle-y part. (This part is difficult to explain, so hopefully the drawing helps.)
 |
| Fig. 4: constructing the toggle-ties |
5. Cut the toggle-slots into the shoes and tie in your toggles [figure 5]. The toggles are adjustable, so you can make them longer or shorter as necessary, just by retying the knot! Clever, right? This is something I copied from Ian; I don't think this function goes back to the Viking age shoes. Their toggles were stitched into place, rather than knotted like these modern versions.
 |
| Fig. 5: cutting the slots for the toggles |
6.
You're done! Congrats! You've just created your
own custom pair of Viking shoes!
After
completing my shoes (whew!), I hold a new and greater appreciation for the art
of shoe-making, especially with historic shoes like these. The
price for a pair of good handmade leather shoes does not seem so
unreasonable after spending so many hours planning and making my own
shoes!
Extra
Tips:
~
I added some more padding to the sole by cutting a second, slightly smaller
piece and using it as an inner-sole.
~You
could also make your shoes with sturdier sole-material, like vibram or rubber.
~I
sealed and somewhat waterproofed my shoes by rubbing in a coat of mink oil.
I'd
love to hear from you, so please post your comments, questions, or results
below!