Showing posts with label medieval methods. Show all posts

Sunday, April 13, 2014

6 Lessons We Can Learn from the Ozark Medieval Fortress

or, How NOT to Build a Medieval Castle in 21st Century America.


Artist's rendering of the completed Ozark Medieval Fortress, originally projected for 2030
A few years ago, a team of investors and enthusiasts led by Michel Guyot broke ground on a 20-year building project to construct a 13th century castle in the middle of the USA. They called it the Ozark Medieval Fortress. It was an ambitious plan to build an entire castle, with towers, walls, and a great hall, using only the methods they would have used in the middle ages. When I heard about this, I was ecstatic. I'd seen a documentary about a similar project, Chateau de Guedelon, in France and thought it was super cool, but thought I'd probably never get to see something like that in person.

But the Ozark Medieval Fortress was only a few hours away, in northern Arkansas! I got to visit once in each in 2010 and 2011, and was hoping to intern there in 2012, but that's when their problems came clearly to the surface in the form of the message which appeared on their website early in 2012: "Opening in 2012 delayed due to financial reasons. We are seeking American financial partners."

They never re-opened.

In looking back at the way the whole Ozark Medieval Fortress was run, I think there's a lot we can learn, and maybe get it right with a stellar medieval castle-building project somewhere in the future. These are the 6 big ideas on what I think was done wrong at the Ozark Medieval Fortress, and how they could be done right, next time.


Breaking limestonewith a chase-masse
6. Don't Start a Risky, Multi-Million Dollar Project in the Middle of a Recession.

Granted, the project's financiers were from Europe, and the economic downturn hadn't really hit Europe yet when the project began to take shape in 2008. The downturn doesn't seem to have been really affecting European economies even when the Fortress opened in 2010. But the recession was certainly in full swing in America at that time. And the Fortress was slated to be built in Lead Hill, Arkansas, smack in the middle of financially-struggling America. Maybe this was taken into consideration, but it seems that it would have been wiser to perhaps wait until a time when people [i.e. - potential visitors] would be more willing to part with their hard-earned dollars to visit a castle in progress, especially when there really wasn't much to look at (in the fortress itself) in the first season, with most of the walls less than 2 ft tall, and maybe 8 ft at the highest sections.

5. Don't Start an Expensive Project with Out-of-Touch Investors.

The project's investors were all from France, and it seems that many of them were or are also involved in the Chateau de Guedelon project. On one hand, that's a good thing. The investors were already steeped in the French culture which the Ozark Medieval Fortress was supposed to embody. The problem, I think, is that they were French, and not American. Perhaps they were more familiar with French history, culture, and the middle ages, but they were probably not familiar with American culture, and how to market a medieval castle building project to an American audience.

Who might have been better investors? I bet a few universities with Medieval Studies programs might have been interested in helping to sponsor the project. Or just wealthy Americans in general - but someone who was familiar with the culture and country in which the project was to be carried out.
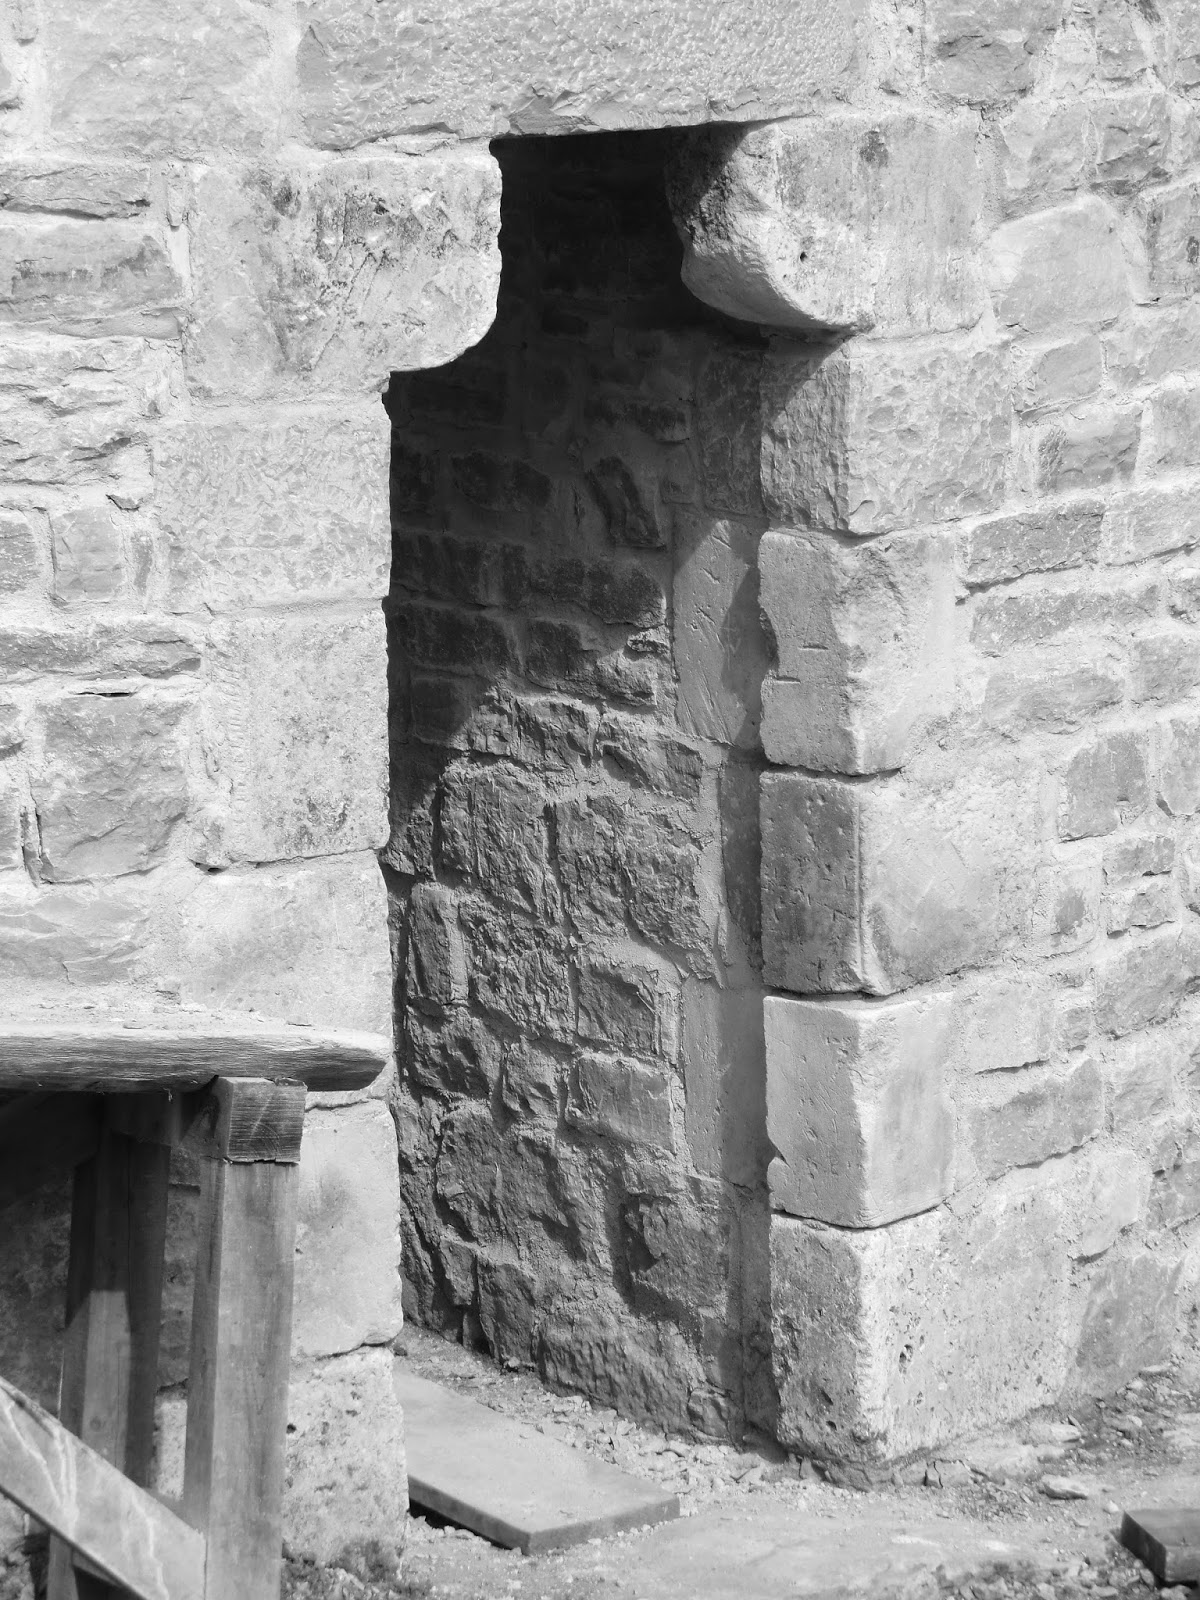
A tower doorway at OMF
4. Don't Start an Expensive, Tourism-Based Project in the Middle of Nowhere.

Why did they pick Arkansas, of all places? Convenience. They touted on their website that the landscape was very similar to that of Southern France, and also happened to have a limestone quarry, which is essential to the castle building, and it was even conveniently only 30 miles south of the touristy Branson, MO. Branson would be a great location for an attraction directed at seniors or families with small children, but Branson, and the entire Midwest is not exactly a place known for its interest in European History. The castle was not at all handicapped accessible and was not exactly a safe environment to encourage young children to run about. These conditions essentially exclude 80-90% of all of Branson's typical visitors.

So what might have been a better location? Somewhere with beautiful scenery that could be compared to somewhere in Europe, but somewhere with a larger population nearby, somewhere that attracts international visitors, and somewhere with a population more inclined to be interested in European history enough to want to visit a Medieval European Style Castle-in-Progress. Good candidates might include locations in Colorado, California, Washington State, Florida, or upstate New York.

3. Don't Translate Your Written Materials Directly from French. Or Any Other Language.

The relationship of the Chateau de Guedelon with the Ozark Medieval Fortress was something akin to a big brother - little sister type of relationship, with much of the information and planning for the OMF coming directly from the French project. This is helpful in that the instructions on masonry and signage come from experts, but this arrangement also caused some problems in translation. Foremost among these was the press release given to news media throughout America to announce the opening of the Ozark Medieval Fortress. Somehow, the facts got mixed up so that the release bragged that the Ozark Medieval Fortress would be "a genuine, full-sized, fortified castle, with 24-foot high towers, a drawbridge, and 6-foot wide stone walls." That sounds rather unimpressive, and not like a full-sized castle, or anything worth visiting. In reality, the walls were 6 feet thick and 24 feet tall, and the tallest of the towers was planned to be over 70 feet tall.

Other instances of translated material not turning out so well was in the signage scattered throughout the castle site. Several had typos or were worded awkwardly, but one in particular explained the "wise witch." This title is perfectly innocuous in France, but in America, the word "witch" has certain very negative connotations. A better English translation would be something like "wise woman" - the village expert on herbs and remedies.

These problems could have all been avoided by assuring that a native English speaker wrote and/or translates all of the written material associated with the Ozark Medieval Fortress.

2. Don't Open A Niche Attraction Without Knowing your Market and How to Appeal to it.

What is an "Ozark Medieval Fortress" anyway? Some people don't even know what "medieval" means, but they're sure going to know what a castle is. "Fortress" brings to mind a civil war fort or other military construction, and not necessarily a castle. Even the word "Ozark" carries a certain stigma with it. The castle could have been named just about anything other than "Ozark Medieval Fortress," as long as "castle" or "chateau" was in the name.

On the castle's website and in their one advertising campaign, the motto was,
"They're building it. Come see it!"
The point of a motto is to stick in peoples' minds and convince them to visit the castle, but I think they could have come up with something far better.

I think the castle's advertising would have been far more effective if the question of "who would want to visit a castle construction site in America?" had been longer considered. They might have chosen a better geographic location, and might have realized that their best target audiences would probably have been students and academics, as well as fans of historical reenacting and fantasy genres.

1. Don't Run a History-Based Attraction Without an Expert Advisor on Board.

Though the project certainly had many staff and volunteers who were well versed in the restoring and building of castles, and even some who were quite familiar with reenacting, it seems that for the most part, there were no true experts involved in the oversight of the Ozark Medieval Fortress. From what I can find, the main tour guide at the castle (who also served as its official historian) had a Bachelor's degree in European History and had attended a summer program on the Middle Ages in Germany. He certainly was very knowledgeable on the Middle Ages, but such credentials hardly compare to someone with a Master's or PhD in Medieval Studies or Medieval History. And no such expert was to be found on the Ozark Medieval Fortress Team. Other good candidates might have been an archaeologist who specialized in medieval sites, an experimental archaeologist, or a historical architect.

If they had held such an expert on staff or even just as an advisor, perhaps the whole project would have turned out differently.


A few news articles have covered the closing of the Ozark Medieval Fortress, including the New York Times, but for the most part it has unfortunately gone unnoticed. I would love to see someone pick up the unfinished castle and breathe new life into it, and I think it could be salvaged. But whether someone buys and revitalizes the Ozark Medieval Fortress, or starts a new project somewhere else, I hope they won't repeat the same mistakes. 

Disclaimer: Some of this information has been very difficult to research, since the Ozark Medieval Fortress website is gone. I might have missed some important information, and I really want this to be an informed and accurate blog, so if you know of any information that I missed that might change what I said, or if I got something wrong, please let me know. I wrote this article to show how we can use the Ozark Medieval Fortress as an example and learn from its problems, so that the next time a project like this is begun in America (or anywhere else), it might have a greater chance at success.

Monday, August 19, 2013

Adventures in Medieval Shoe-Making! (a tutorial)


annaleshistoriae.blogspot.com
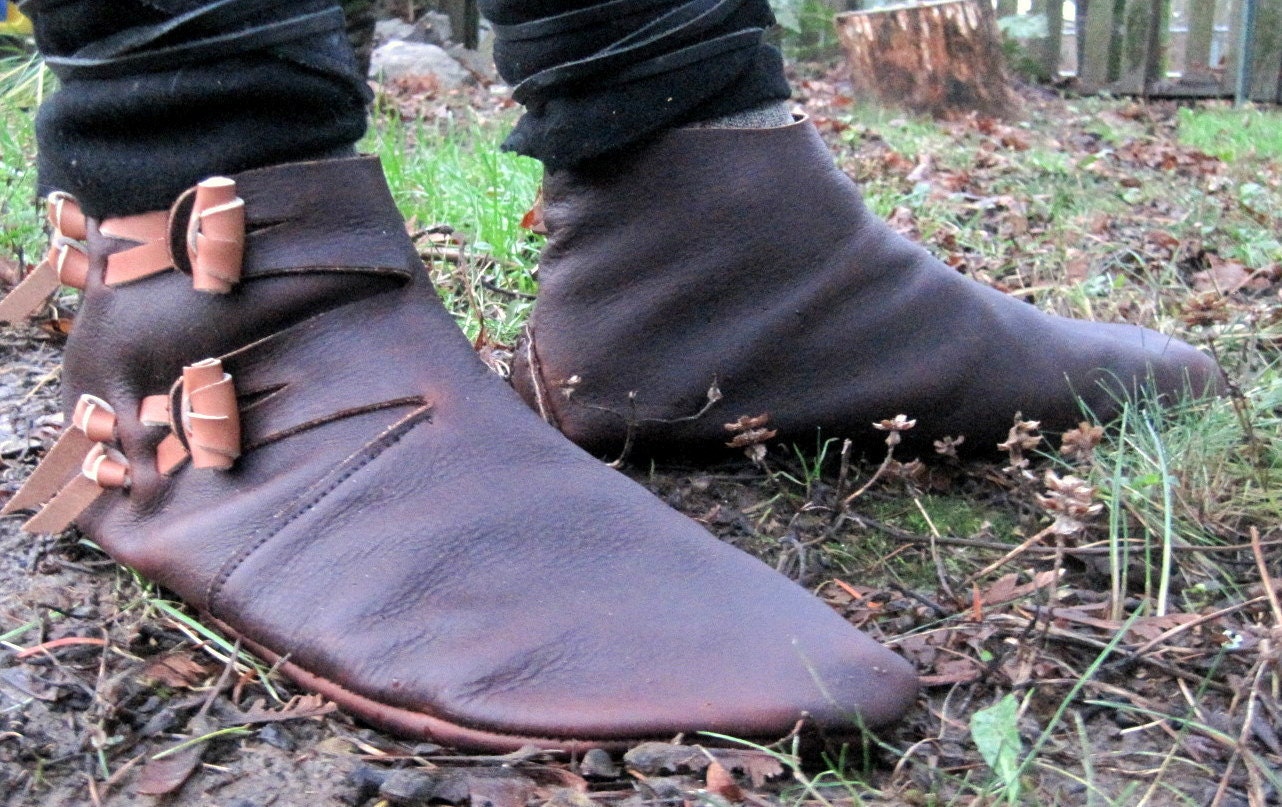
Dorestad: Old Norse Reproduction Handmade Leather Shoe by Barefoot Cordwainer on Etsy

A while ago, while browsing Etsy.com, I discovered this beautiful pair of handmade shoes, reproductions of a 9th - 10th century Norse style shoe by Ian at Barefoot Cordwainer. I really loved them, but couldn't quite afford to buy them, so I thought I'd give shoe-making a shot and see if I could figure out how to make a pair for myself. I searched the internet for how-to's and tutorials on the subject, but most of what I found related to Native American style moccasins, not medieval European style shoes, so they were of little help. I ended up piecing together my process from several different sources, each of which contributed their experience to my plans.

Disclaimer: it has been over a year since I actually made my Viking shoes, and I've intended to write a post about the process since then, but seeing an actual extant example of a Viking shoe like mine in the Jorvik Museum in York, England a few weeks ago has rekindled my motivation to publish this post. So my memory of the shoe-making process might be a little spotty and I might miss some things in my explanation below. Hopefully this will still be interesting and informative for you, whether you're just curious, looking to make your own medieval shoes, or want to better appreciate the handmade shoes you're about to buy from Ian (the Barefoot Cordwainer).

Note: This is NOT a process for kids. The shoe-making process (at least how I did it) involves using sharp things in very close proximity to human flesh. And it is complicated. Please be careful.

***Possibly the Most Important Note: These shoes are supposed to fit snugly; they will conform to your feet and therefore move better with you. Make sure they're snug, but not too tight.

Supplies:


  • mock-up:
    • sock
    • sewing needle and thread
    • duct tape
    • sewing pins
    • fine-tipped pen
    • scissors
    • fabric (good if it's slightly stretchy)
  • final shoes:
    • leather (I used elk hide)
    • sewing needle and thread (specifically for leather)
    • fine-point felt-tip pen
    • an awl


Making the Mock-Up:
The mock-up will serve as the pattern for your actual shoe, and since you want your shoes to fit snugly and conform to your feet, using a well-fitting sock is important. You just need one mock-up, because you can use it as the pattern for both your right and left shoes.

Fig. 1: blue= where to draw and cut seams in duct tape sock
  1. Put the sock on your right foot and then cover the sock in duct tape. Make sure to leave the rim of the duct tape-sock where you want the tops of your shoes to sit on your ankles (or legs, if you're making boots). Don't wrap the tape too terribly tight, as you don't want to make the shoes too small, and also be sure to leave room between the sock and your foot so you can cut it off of your foot.
  2. Draw your seams onto the duct-tape sock [figure 1]. This can be a bit tricky. At this point, do not worry about the little straps that will form the closures for the shoes; you're just working to get the shape for the two main pieces of leather so that they will fit your foot properly. Draw a line around the base of your foot for the seam between the sole and body of the shoe, then another from the top of the shoe, down the center, then turning toward the sole (toward the outside of your foot) almost halfway to the tip of your foot.
  3. Cut along the seams you just drew, literally cutting the duct tape sock off of your foot. Be very careful that you don't cut your foot! You should end up with two pieces of duct taped sock: the sole, and the funky-shaped body. Flatten these out as much as possible so that the next step will be accurate.
  4. Trace the cut out duct tape sock pieces onto your fabric, then add at least a centimeter for stitching where the seams will be [figure 2]. You also need to add the triangle-ish straps at this point, which you can do by drawing the shape on a piece of paper and then adding it to the pattern for your shoe body, twice, so that you'll end up with two straps. Don't forget the little triangle heel-reinforcement piece!
    Fig. 2: tracing the duct-tape sock pieces onto the fabric

     
  5. Cut out and stitch together your new fabric mock-up. Stitch the body together first, then add the sole and heel-triangle. This is harder than it sounds, as you need to make sure that your pieces are lined up properly. You'll probably need to make some adjustments along the way. Check often to make sure that it fits on your foot and adjust accordingly. Remember that you want the shoe to be snug, but you also need to be able to wiggle your toes and get your foot in and out without straining the fabric too much.
    1. It can help immensely to mark notches in the heel and toe to help in matching the pieces up properly in the leather version.
  6. Once your mockup fits how you'd like it to, take out all of the stitching, and it can be used as the pattern for your actual leather shoes.
Making the Leather Shoes:
using the fabric mock-up as a pattern on the leather

1. Choose the parts of your leather that will make the shoes (thicker parts for the soles, softer - but not too soft! - for the upper parts) and trace your fabric pattern onto the suede (back) side of the leather accordingly. Make one set of pieces (sole, upper, heel-triangle) for each foot, and mark them on the back as you cut them. Use the pattern right side up for your right foot, then upside down for the left. Be sure to transfer the notches from your pattern to the back sides of the leather, too.


stitch together the shoe body first
2. Stitch the shoe uppers (body) together first. Depending on your materials, you might need to punch holes in the leather with an awl before stitching. Remember to stitch it inside out.
3. Stitch the soles to the uppers. Take this slowly and carefully. Remember that leather is not as forgiving as fabric, and that's why making all of the adjustments in the mock-up stage is important. Make use of the notches you marked from your pattern to be sure your soles match with the uppers properly. If you're punching holes for stitching, counting to make sure the numbers match up helps immensely. And don't forget the heel-triangles [figure 3]!

Fig. 3: sew the heel-triangle in as shown so it will look right when turned right-side-out.
 4. Construct the toggle-ties [figure 4]. You will need 4 of these, 2 for each shoe. I made these out of a slightly thicker and stiffer leather, in a lighter color (white) to accent the shoes. Cut 4 strips, each about an inch wide, and then cut them in half down most of the strip's length, leaving enough space to cut a slot to feed those two ends through in order to make the toggle's toggle-y part. (This part is difficult to explain, so hopefully the drawing helps.)


Fig. 4: constructing the toggle-ties
5. Cut the toggle-slots into the shoes and tie in your toggles [figure 5]. The toggles are adjustable, so you can make them longer or shorter as necessary, just by retying the knot! Clever, right? This is something I copied from Ian; I don't think this function goes back to the Viking age shoes. Their toggles were stitched into place, rather than knotted like these modern versions.

Fig. 5: cutting the slots for the toggles


6. You're done! Congrats! You've just created your own custom pair of Viking shoes!


annaleshistoriae.blogspot.com
After completing my shoes (whew!), I hold a new and greater appreciation for the art of shoe-making, especially with historic shoes like these. The price for a pair of good handmade leather shoes does not seem so unreasonable after spending so many hours planning and making my own shoes!


Extra Tips:

~ I bought my elk hide leather from ACS Trading Post.
~ I added some more padding to the sole by cutting a second, slightly smaller piece and using it as an inner-sole. 
~You could also make your shoes with sturdier sole-material, like vibram or rubber.
~I sealed and somewhat waterproofed my shoes by rubbing in a coat of mink oil.

I'd love to hear from you, so please post your comments, questions, or results below!

Thursday, May 24, 2012

Hand-Bound Medieval Book Giveaway!

To show my great appreciation to everyone who reads my blog, I want to give away one of my hand-bound leather journals! I have been binding leather books using medieval methods for about three years, and I sell most of my books on my Etsy shop, Badon Hill, named after the site of the 12th and greatest of the historical King Arthur's battles.

So, I thought it might be spiffy to have a little giveaway in celebration of my third year in bookbinding (coming up on June 15). I will announce the winner on or around June 25, 2012.

Here's the journal you could win:

I hand-bound this journal with a chestnut-brown leather cover, and it closes with a black kidskin strap. The 320 pages (or 160 sheets) were hand-torn to give it an old world feel, then bound into the cover using a late-medieval long stitch. 
The paper is unlined, acid-free, 50 lb. Strathmore drawing paper; perfect for writing and sketching.
This journal is 4 1/2 by 3 inches in size, so it will make a great travel or pocket journal or sketchbook. It is inspired by Little John, from the Robin Hood stories. Little John may have been far from little, himself, but he had a soft sort of ruggedness, and a good sense of humor. Likewise, this journal has a rugged and sturdy, yet soft, leather cover, and a simple sense of medieval style. It's ready to be filled with your own stories of adventure, drawings, notes, and schemes!

And here's how you can enter to win this journal: Each option will enter your name in the drawing once. -

1. Comment on this blog post and tell me which of the items for sale in my shop you like best.
2. Follow my blog. :)
3. Join my Facebook page.
3. Add my shop to your favorites on Etsy.
4. Tweet on Twitter or post on Facebook with a link to this giveaway. Only once per method (don't spam!), let me know if you did either Twitter, Facebook, or both.

(Be sure to leave a comment here giving me your name and email address, and tell me which of the options you did,so I know how many times to enter your name [and how to contact the winner]!)

*This giveaway is now closed. See who won here!*